Your cart is currently empty!
Veterinary Dental X-ray Generators, CR and DR Systems
There are five things we consider when recommending dental x-ray equipment for veterinarians:
- Image Quality. This is directly related to the equipment and includes the x-ray generator and the devices used to capture and view the image.
- Training. Making sure your team know how to take diagnostic images and understand what they are seeing.
- Workflow. Fitting dental x-ray into your dental procedures without adding lots of extra time.
- Local Service. In the unlikely event of equipment failure, local service becomes important. Many companies expect you to send equipment overseas which is costly and leaves clinics unable to provide services.
- Pricing. How to price veterinary dental radiography for your clients so that the service is well accepted.
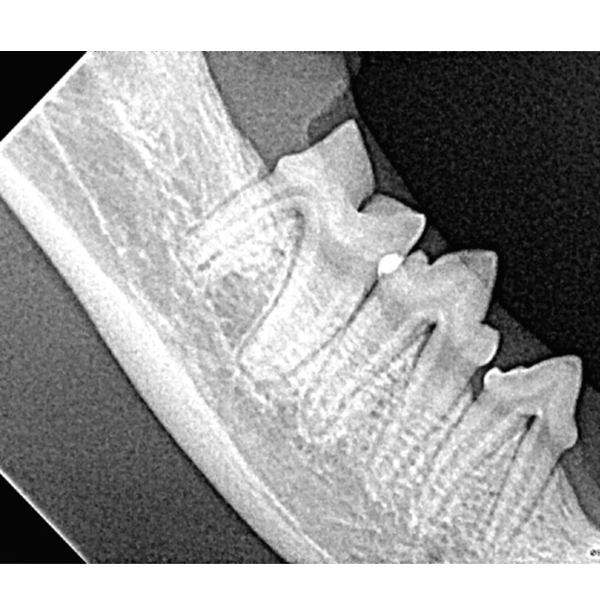
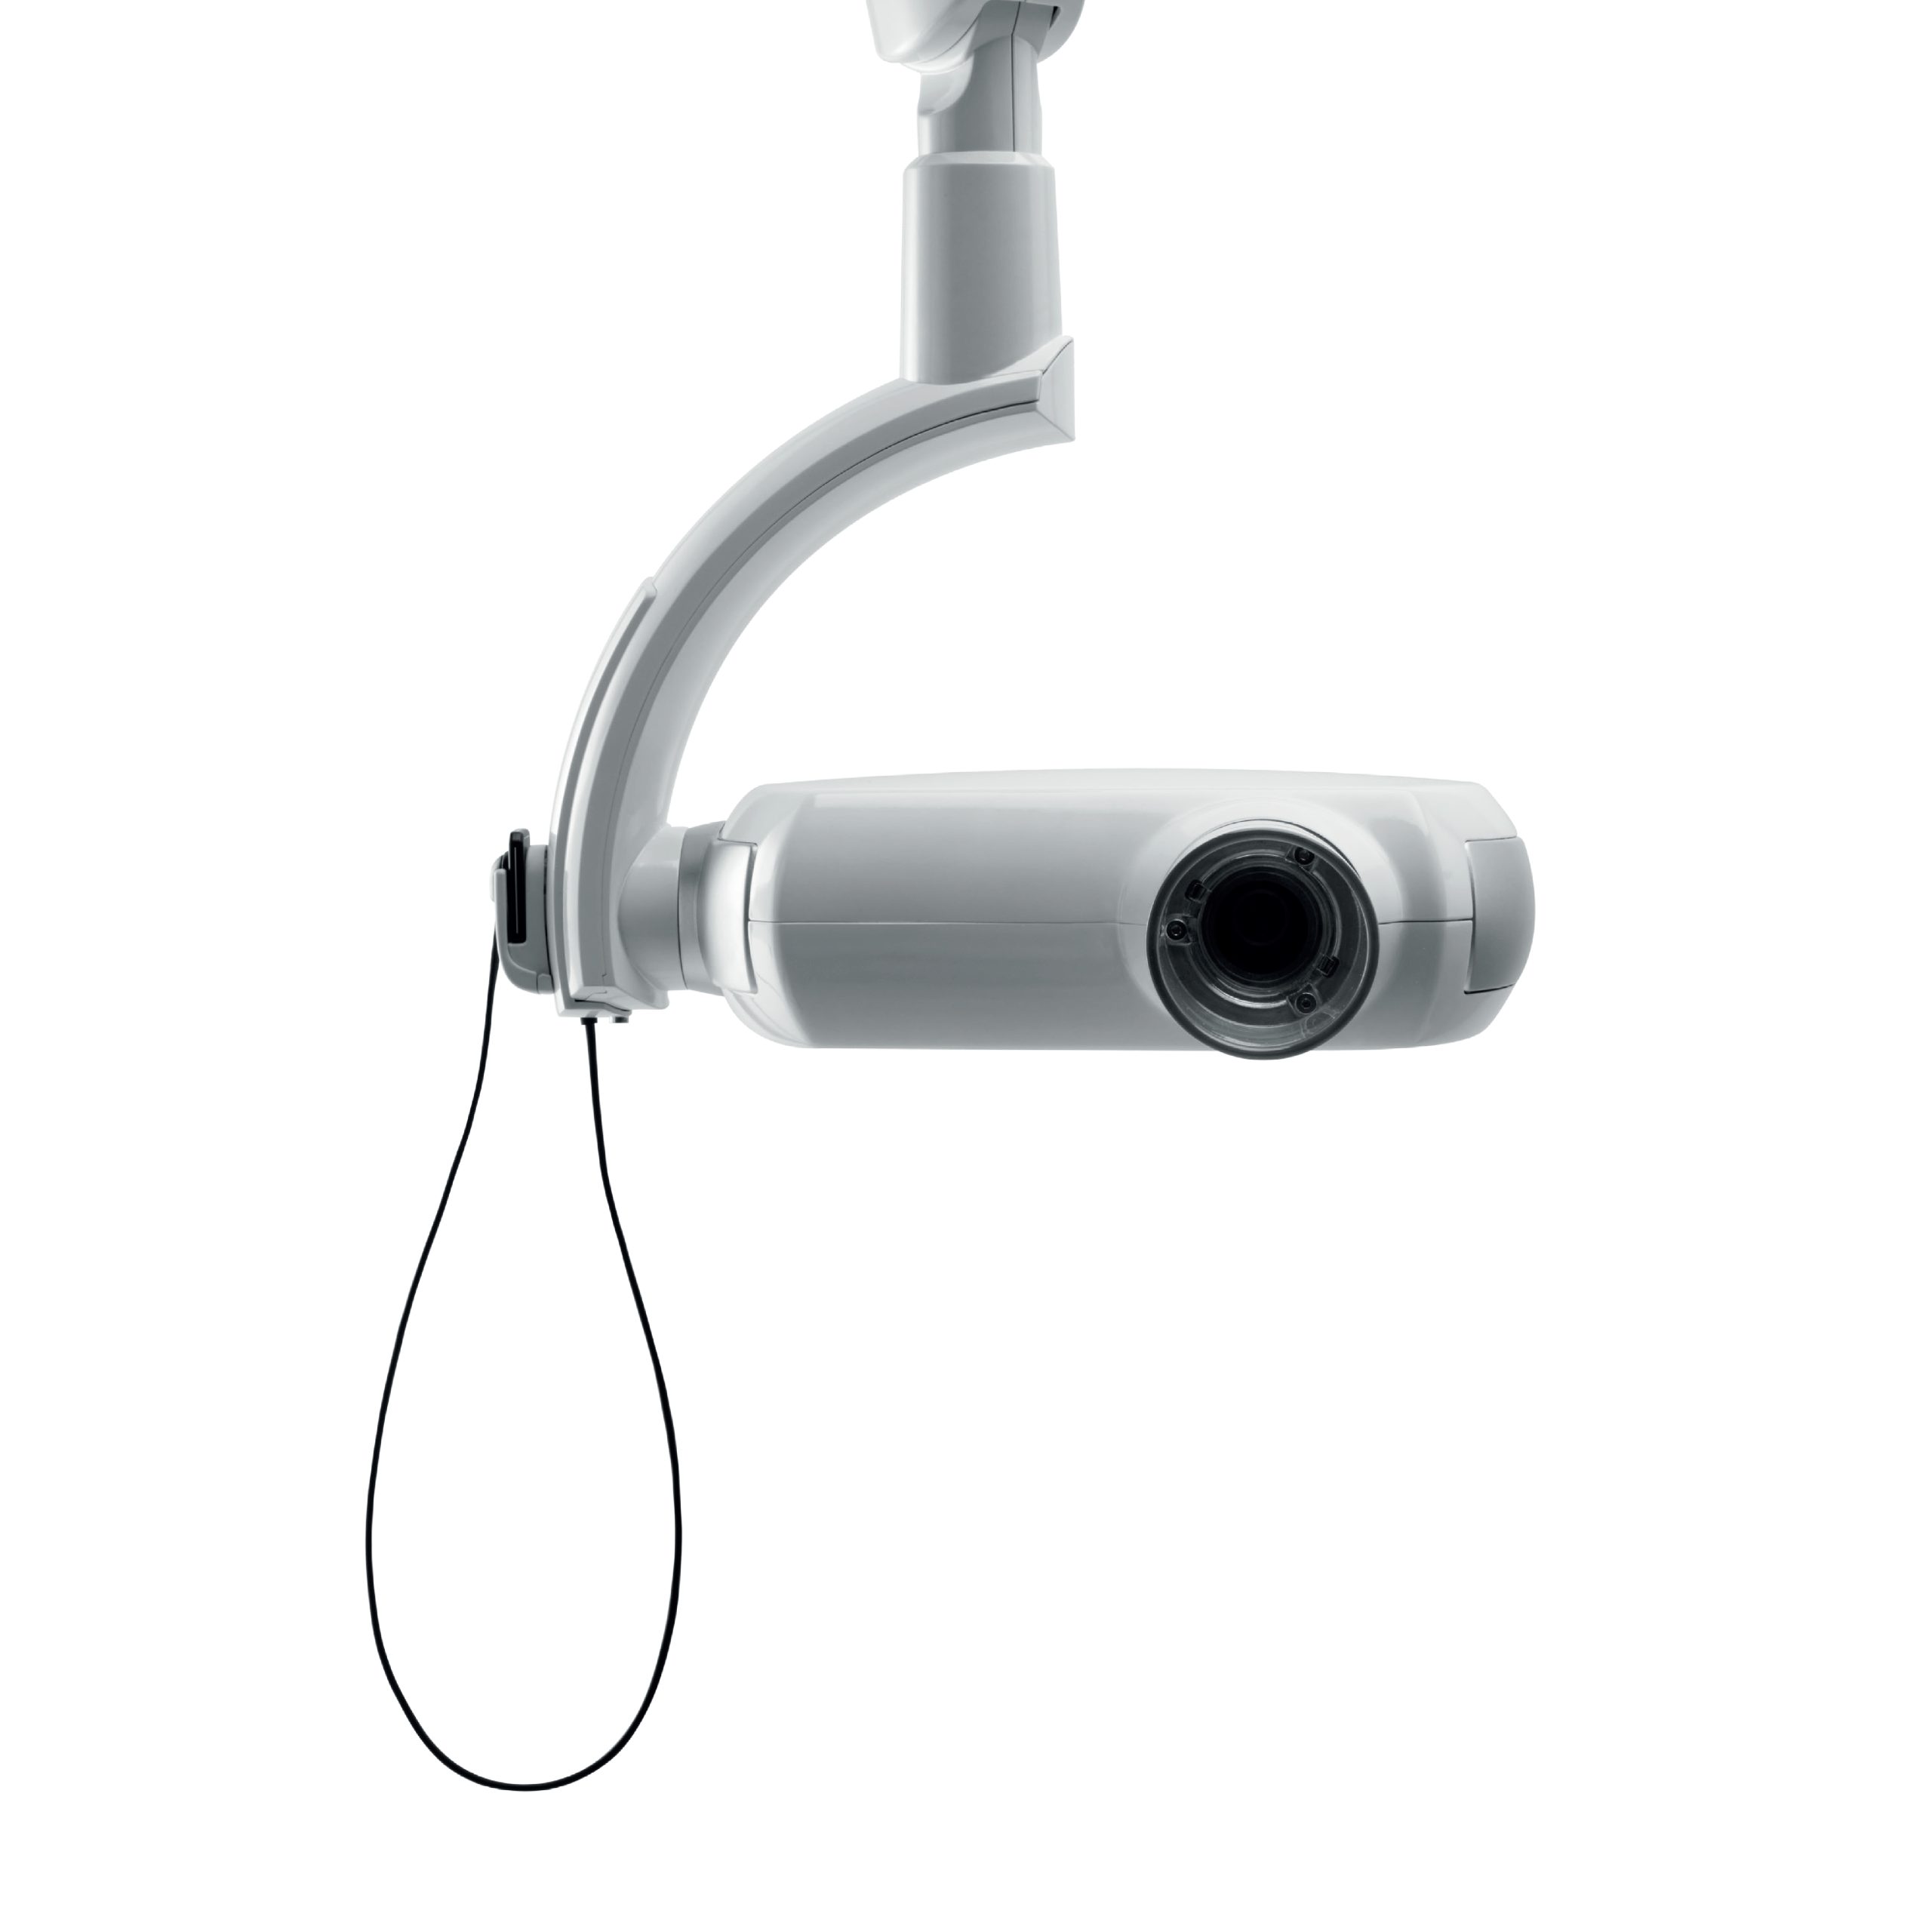
Image Quality
The range of dental x-ray equipment available is large, ranging from cheaper units made in Asia, to more expensive European and American made units.
So what exactly is the difference?
More to the point what should everyone consider before choosing a veterinary dental x-ray system?
Firstly, we need high image quality to see the periodontal structures in the size range of the patients seen in companion animal practice. The generator that is chosen makes a large difference to image quality. The kVp is the quality or power of the x-ray beam and directly relates to the contrast or grey scale of an image.
Thinking it through first will avoid costly mistakes or equipment that your team just won’t use.
If you imagine the difference in size between the teeth of a small cat and a Great Dane it helps to understand why having a range of kVp is necessary. To cover this range, a veterinary generator should be able to be set at 60kVp, 65kVp and 70kVp.
Having discussed kVp, which is the quality or power of the beam, the next variable is mAs or milliamp seconds. This controls the blackness or density of an image. It is calculated by multiplying milliamps by exposure time in fractions of a second. For example if mA = 200 and time is 0.25 sec the mAs = 50.
The problem is that there are many combinations that make the same mAs. For example 200 mA X 0.125 Sec = 20 mAs but so does 40mA X 0.5 secs and 20 mA X 1 sec. The question is, which one will produce the best image for the type of animal and tooth being x-rayed?
If you choose a generator that is designed for human use, you will have to work through the almost endless setting variables to find a match for incisors, canines, premolars and molars for maxillary and mandibular teeth of small, medium and large breeds for all the species your clinic sees. This means you are asking your team to make some very complicated calculations which normally results in images which are non diagnostic.
A veterinary specific generator, has a special selection panel that automatically selects the correct settings based on the species, size of animal, type and location of tooth. This saves a lot of complex calculation and time. Without a detailed veterinary control panel, the equipment is often considered too hard to use and is left idle rather than used at every dental appointment.
Image Quality – Veterinary Dental X-Ray Generators
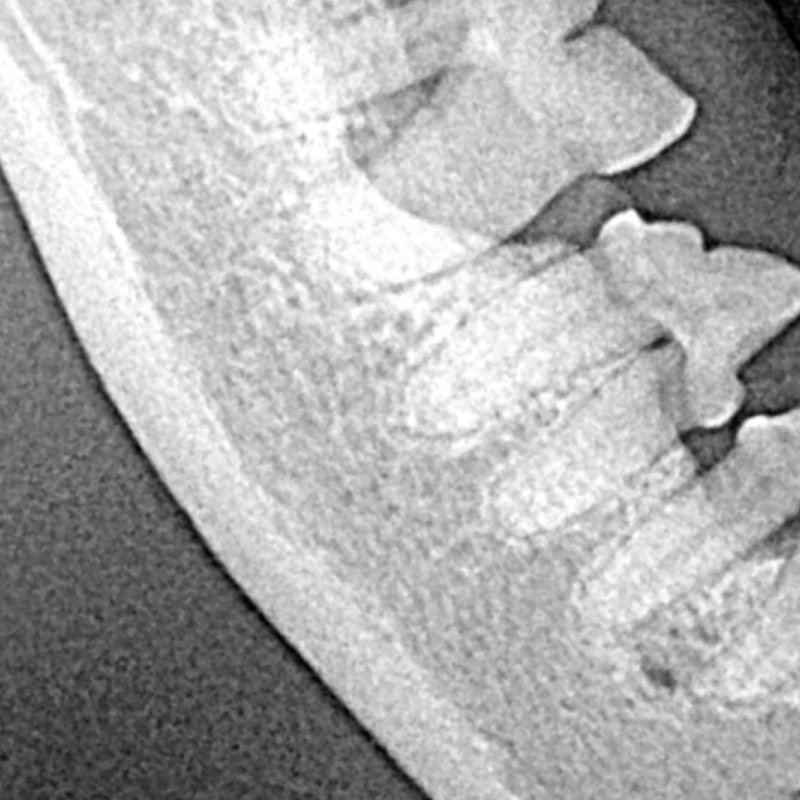
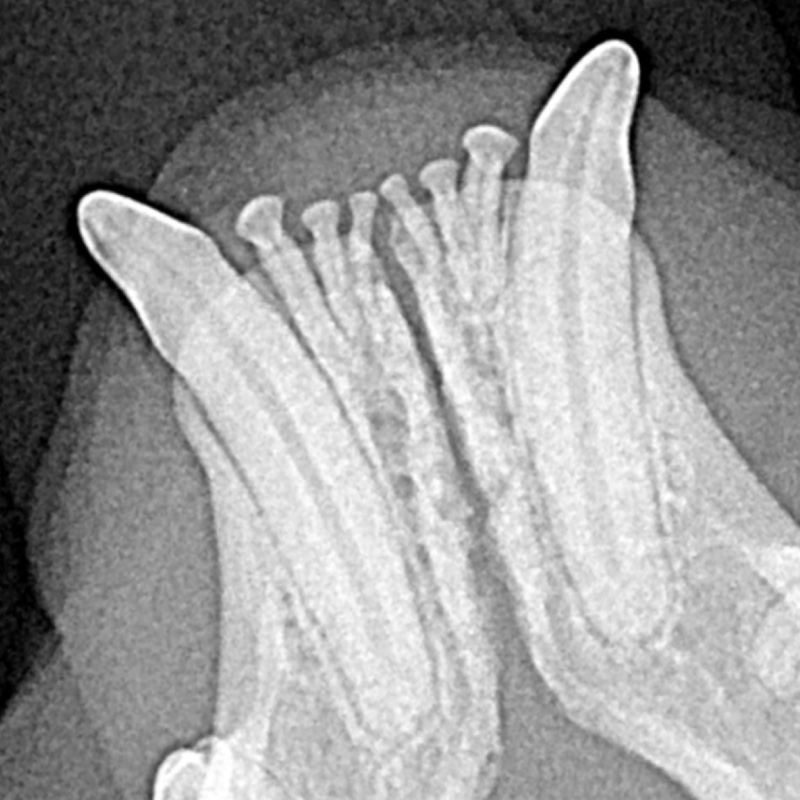
Focal Spot: As well as the correct settings, the focal spot of a generator is very important too. In the early days of veterinary dental radiography, focal spots were large at 7mm. Today the focal spots of veterinary dental generators are 3 mm or 4 mm. The difference is staggering as the below images demonstrate.
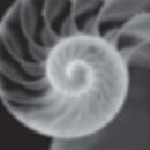
7mm Focal Spot
A 7 mm focal spot produces an image with fuzzy edges. This makes it difficult to discern pathology and see the periodontal structures in veterinary dentistry.
The first image was taken using a Sopix digital sensor with a 7mm focal spot. The image has the typical fuzzy edges. We can see the basic structure but it is not clear and sharp.
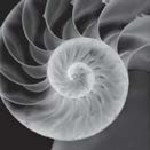
4mm Focal Spot
A 4 mm focal spot produces a sharp image with clear edges. This makes it easy to discern pathology and see the periodontal structures in veterinary dentistry.
The second image was taken using the same Sopix sensor with a 4mm focal spot. It is sharp & clear so that detail can be seen.
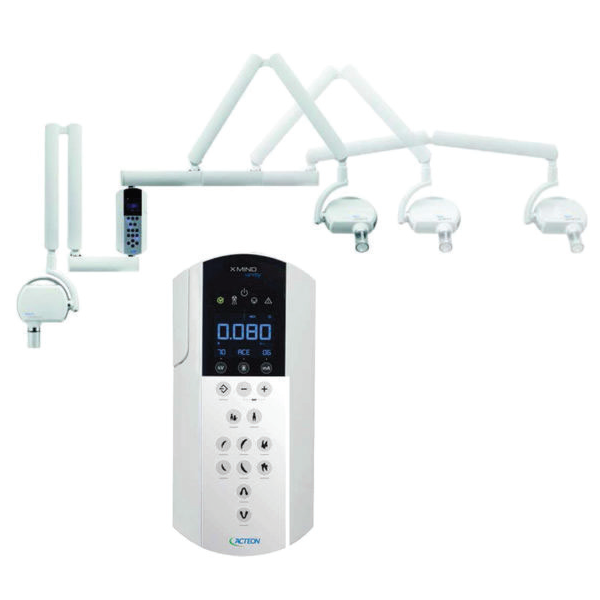
Wall mount if possible, trolleys are also good. Hand held should be a last resort.
Stability is also important. As you can appreciate, if a generator moves during x-raying the image will not be clear. Generators may be kept steady by being mounted on a wall or a mobile trolley. Mounting a generator on a wall is not always possible and can be limiting if you have more than one place you provide dental services, and in these cases, a trolley is more practical. Hand held units are available, but require full radiographic aprons to be worn, are heavy and difficult for many nurses to hold steady and generally slow things down a lot.
Sufficient Cooling Oil: A dental x-ray can generate up to 70,000 volts (at 70kVp) and, with images taken one after the other, will require sufficient cooling oil to avoid frustrating delays. This is represented by the size of the bulge at the back of the cone. Size really does matter and the more oil the better.
Safety is last but not least. It is recommended that users remain a minimum of 2 metres away from a dental x-ray unit so, at a minimum, a control cord should allow the user to remain that distance from the tube head. The Unity has a communication between the sensor and generator. This controls radiation exposure to the minimum required, reducing exposure by as much as 50%.
Image Quality – Image Capture
Things have advanced a long way since film, but the same principles apply. The two main methods for capturing images are the use of phosphor plates with an image processing machine and software (CR System) or the use of a digital CMOS sensor and software (DR System).
Choose wisely as workflow is everything…

With a CR system the phosphor plates are a consumable item that attracts cost over the life of the system. A special reader machine with software to display, store and manipulate images is required. CR systems are typically double the cost of DR systems. CR systems normally have a range of plate sizes and the larger size 6 plates are useful for extremities and exotic pet images.
Often size four plates can be used for a quick image to rule out severe fractures. However, only a small portion of the image is suitable for diagnostic use. A common problem is that the canine teeth are elongated rendering it impossible to see pulpitis, and the molars are foreshortened and superimposed leaving only a small area in the centre of the plate suitable for diagnostic interpretation.
Multiple views of the upper pre-molars and molars are always required to be able to see the three roots clearly. Using a CR system means each view requires removal of the plate, processing in a special machine and then display and manipulation. This can take as much as 30 minutes, just for the upper pre-molars and molars of a dog.
CMOS sensors or DR systems have a fixed size. For veterinary medicine the size two sensor is a good size. Typically these sensors are half the cost of a CR system. They are small and easy to place in the patient’s mouth and almost instantly provide an image for the user to see. The quick image means that a full set of radiographs can be produced in the time it takes a CR system to process only a few images.
Image quality varies dramatically with sensors. Many sales people talk about theoretical line pairs but these are a subjective and calculated measure. The true test is if the image is sharp and has good contrast so that the periodontal structures of the tooth are clearly visible. Care should be taken to ensure that the definition and contrast allow the user to clearly see and understand what is viewed.
It is a popular misconception that DR sensors are fragile. They are designed for anaesthetised patients and, providing that correct protocols are followed, reputable manufacturers will honour warranties in the very unlikely event that one is damaged.
Training
Most veterinarians and nurses are familiar with taking x-rays of broken bones using a parallel technique with large plates. Dental x-rays are very different as the anatomy of the oral cavity does not allow the teeth, plate or sensor and generator to be positioned parallel to each other. The varying structures of the teeth also require images to be taken from different positions so that they can be viewed.
This requires specific training to learn techniques that allow vets and nurses to quickly take diagnostic quality images. Techniques differ from species to species and require intra and extra oral use of plates or sensors and an understanding of how to position and re-position the generator tube.
Training is half a day so that each attendee can learn how to produce a full set of radiographs in feline and canine species. A follow up session is also conducted approximately 8 weeks later so that any specific issues that may arise can be resolved.
“Ian and Angus from VDS ran a full on informative day with both lectures and hands on practice. They are both incredibly approachable, practical and obviously passionate about dentistry. Our confidence in all aspects of the dentistry we offer has increased and so have the sales“
Dr Nina Field, VetEnt Ashburton
Workflow
Having a system that fits into your dental workflow will make or break the success of a dental x-ray program. Without good workflow, patients will require extended anaesthesia and the time taken will make team members reluctant to use the equipment and add so much cost that it’s not viable.
Typically the interruptions to workflow are:
- Programming the generator ( 2 – 3 Mins per time)
- Positioning the sensor and tube head ( 2 Mins per time)
- Processing non digital images ( 5 – 7 Mins per time)
- Image manipulation ( 2 Mins) Interpretation of image ( 3 Mins)
With this in mind, it is common for dental radiographs to take in excess of 14 mins to produce and interpret for systems that are not specifically designed for veterinary medicine. It is best practice to radiograph dental pathology pre and post extraction. Commonly multiple teeth are extracted (at least 3 or more) and, with poorly selected equipment, it takes almost 90 minutes to follow best practice. This results in the equipment not being used.
Local Service
As with all mechanical equipment, maintenance and repair will need to be provided from time to time. As New Zealand’s only dedicated veterinary dental supplier, we maintain a nationwide network of dental equipment technicians from Auckland to Invercargill. Qualified dental radiographic, electrical and pneumatic engineers locally service all our equipment so there is no need to send equipment overseas for service and repair.
Pricing
Clients understand the concept of dental x-rays. Clinical best practice requires dental x-ray, so pricing to make it widely accepted and provide a return on investment is very important.
Successful clinics tend to charge a set fee per image with a cap by species. For example $30 per image with a cap at $150 for feline patients and $30 per image with a cap at $210 for canine patients.
With wisely chosen equipment, the process takes 1 min per image and there are few consumable costs.